
Wooden I-joists - Nodal solutions - Floor in stick built homes
Solutions for floor structures and ceiling slab in stick-built homes
Wooden i-joists are widely used in stick-built home construction
 |
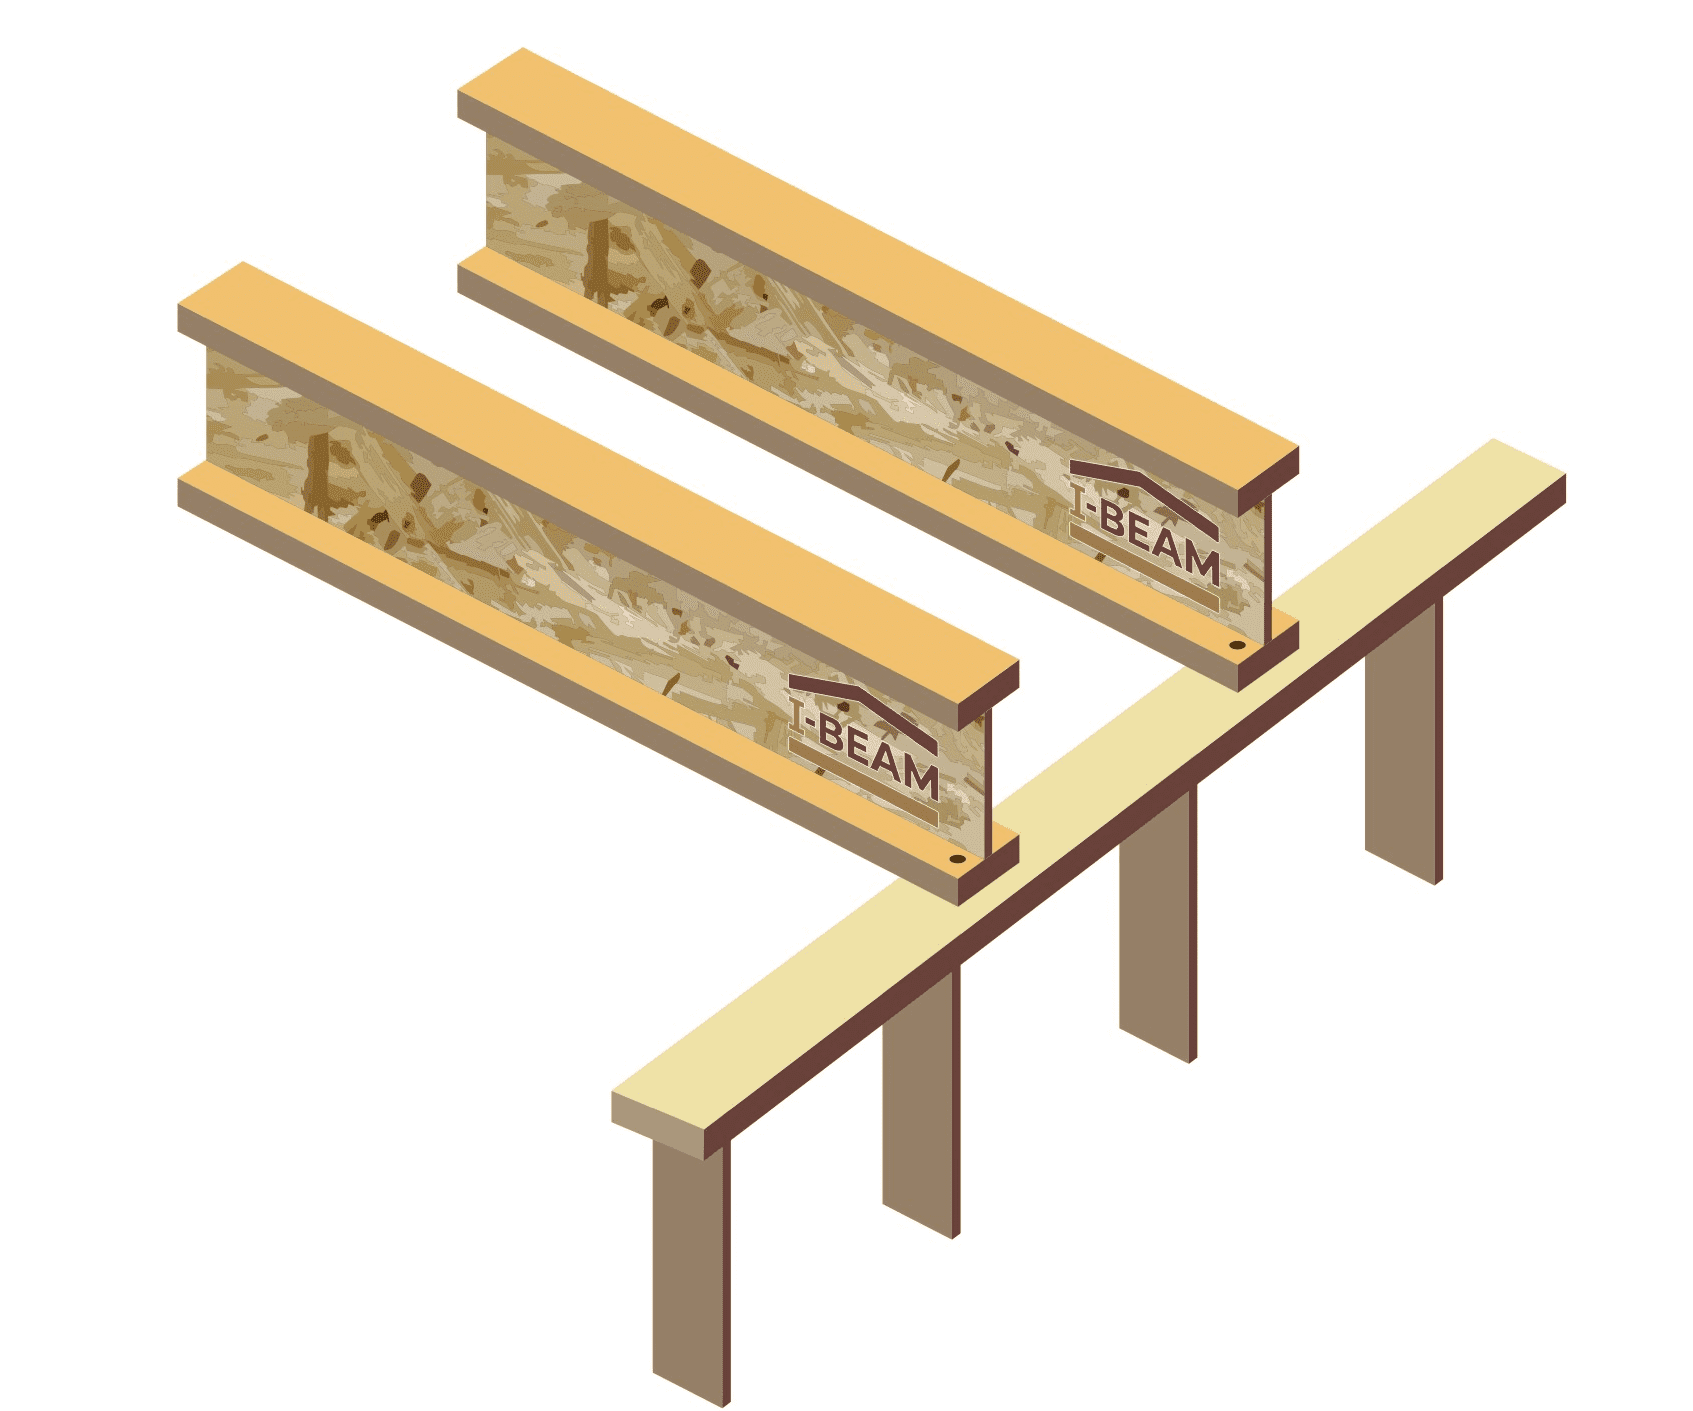 |
I-joists are installed on the wall or on the strapping bar using nails. It is recommended to fasten at a distance of at least 1.4 – 1.8in from the end of the i-joist. Nails are recommended to hammer at an angle. |
 |
It is recommended to fasten the strapping beam to the support bar using barbed nails at every 60-80in of i-joist, as shown in the diagram |
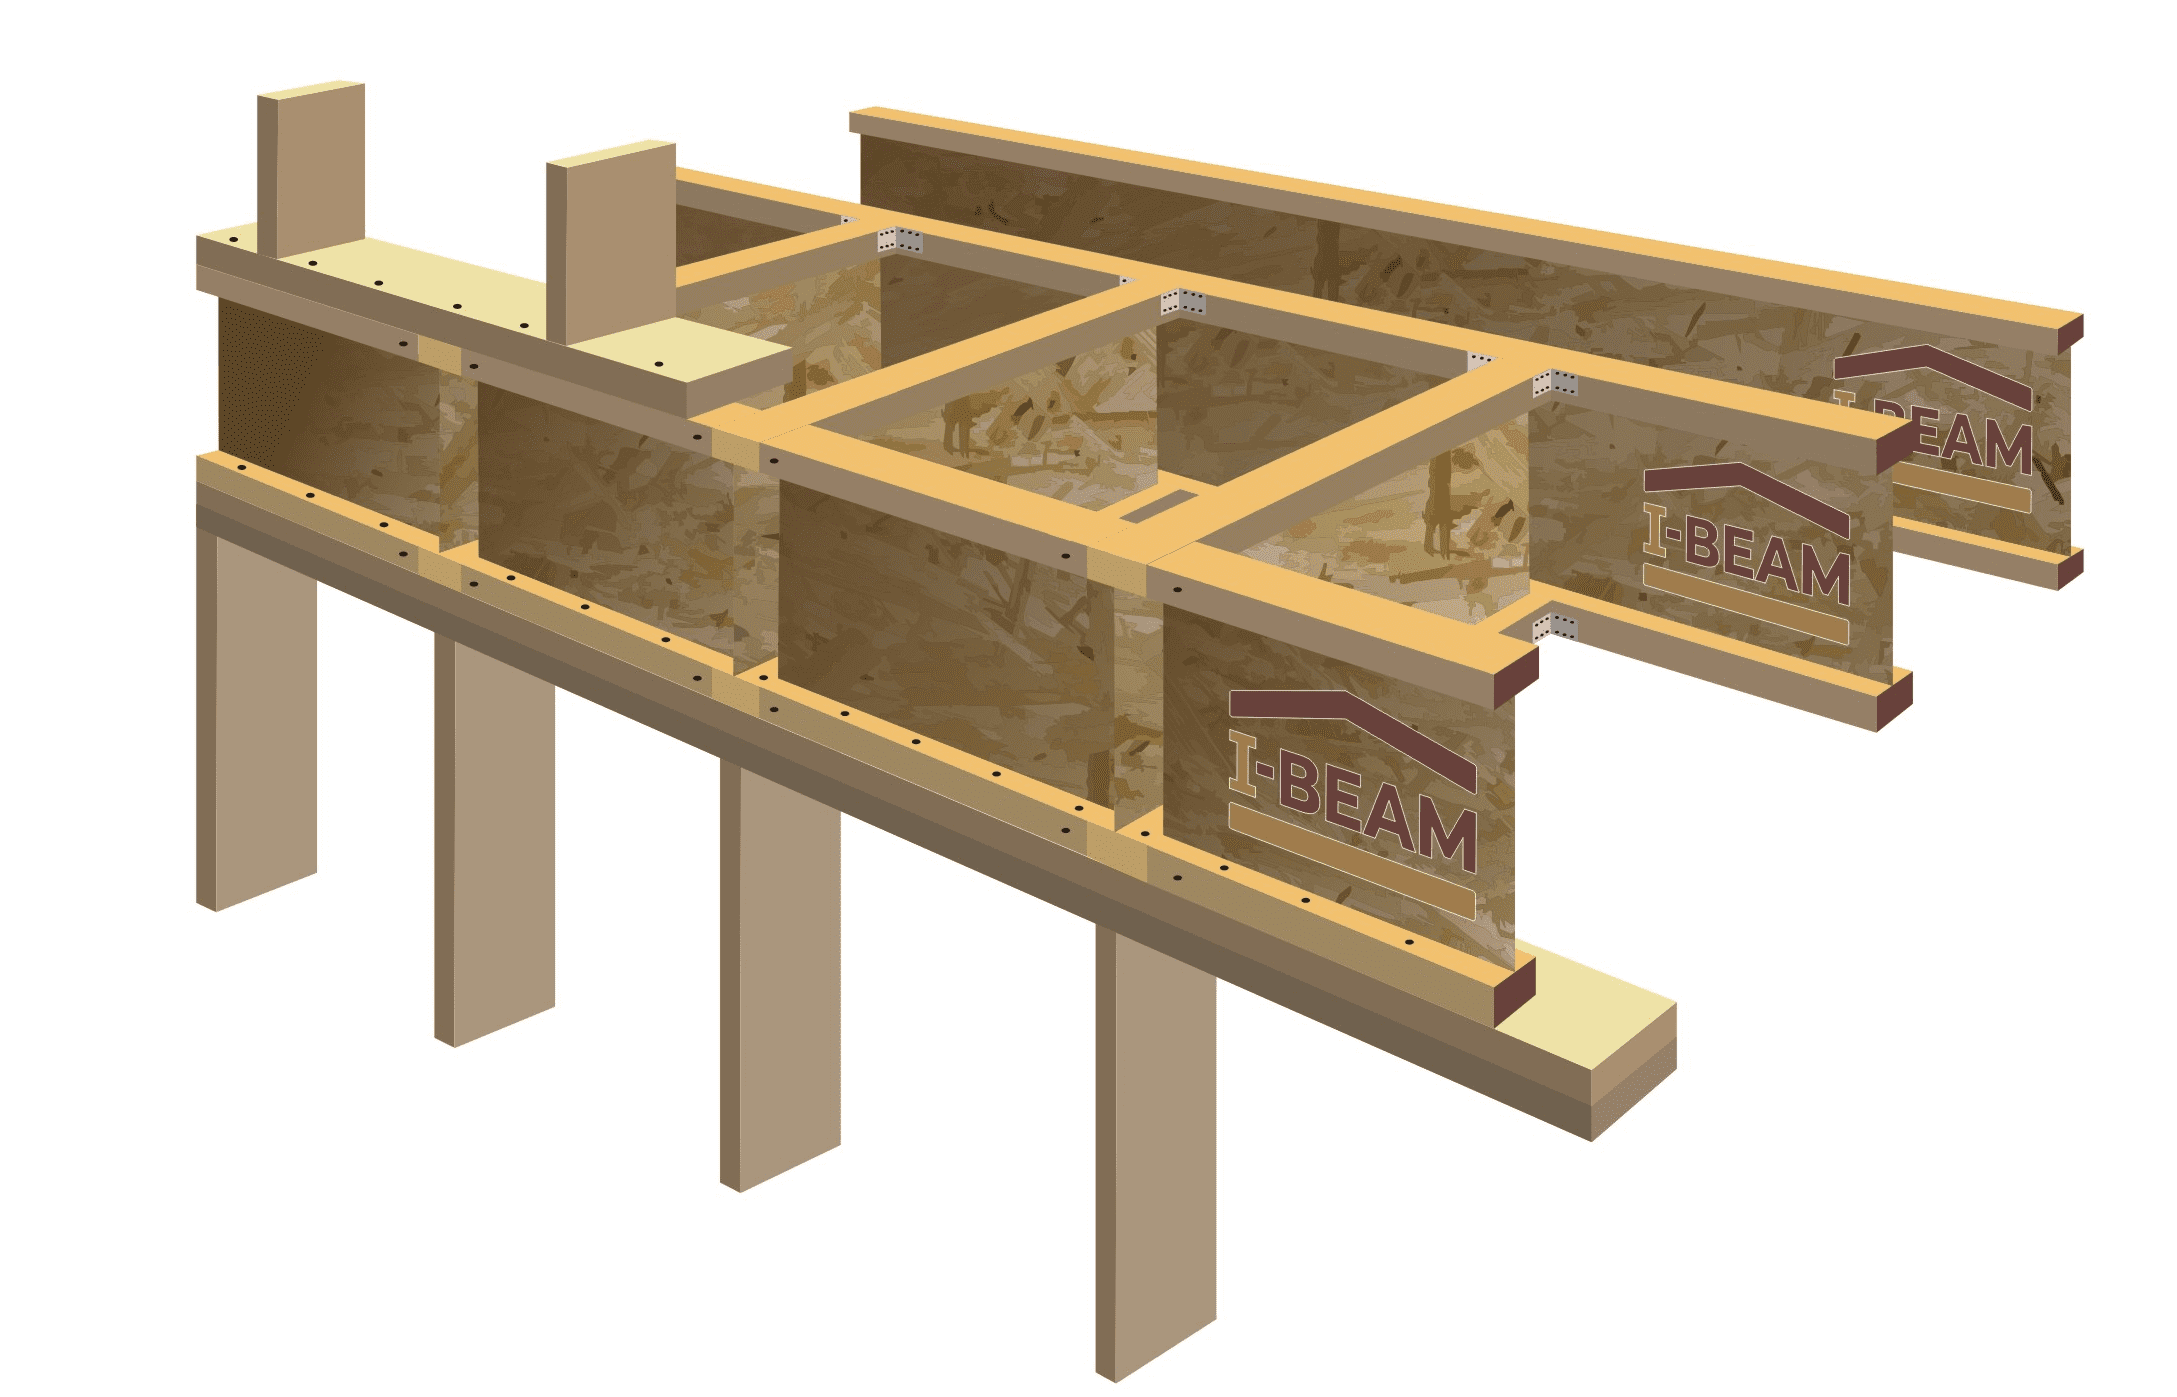 |
Floor i-joists are installed along the outer walls. For greater strength and even load distribution, links should be installed between the i-joists, as shown in the diagram, which are attached to the main i-joists using the angle for such purpose. |
 |
When building the second floor of the house, the ceiling i-joists are installed on the walls of the first floor, as shown in the diagram. For greater strength and even load distribution, connections are installed between the i-joists. |
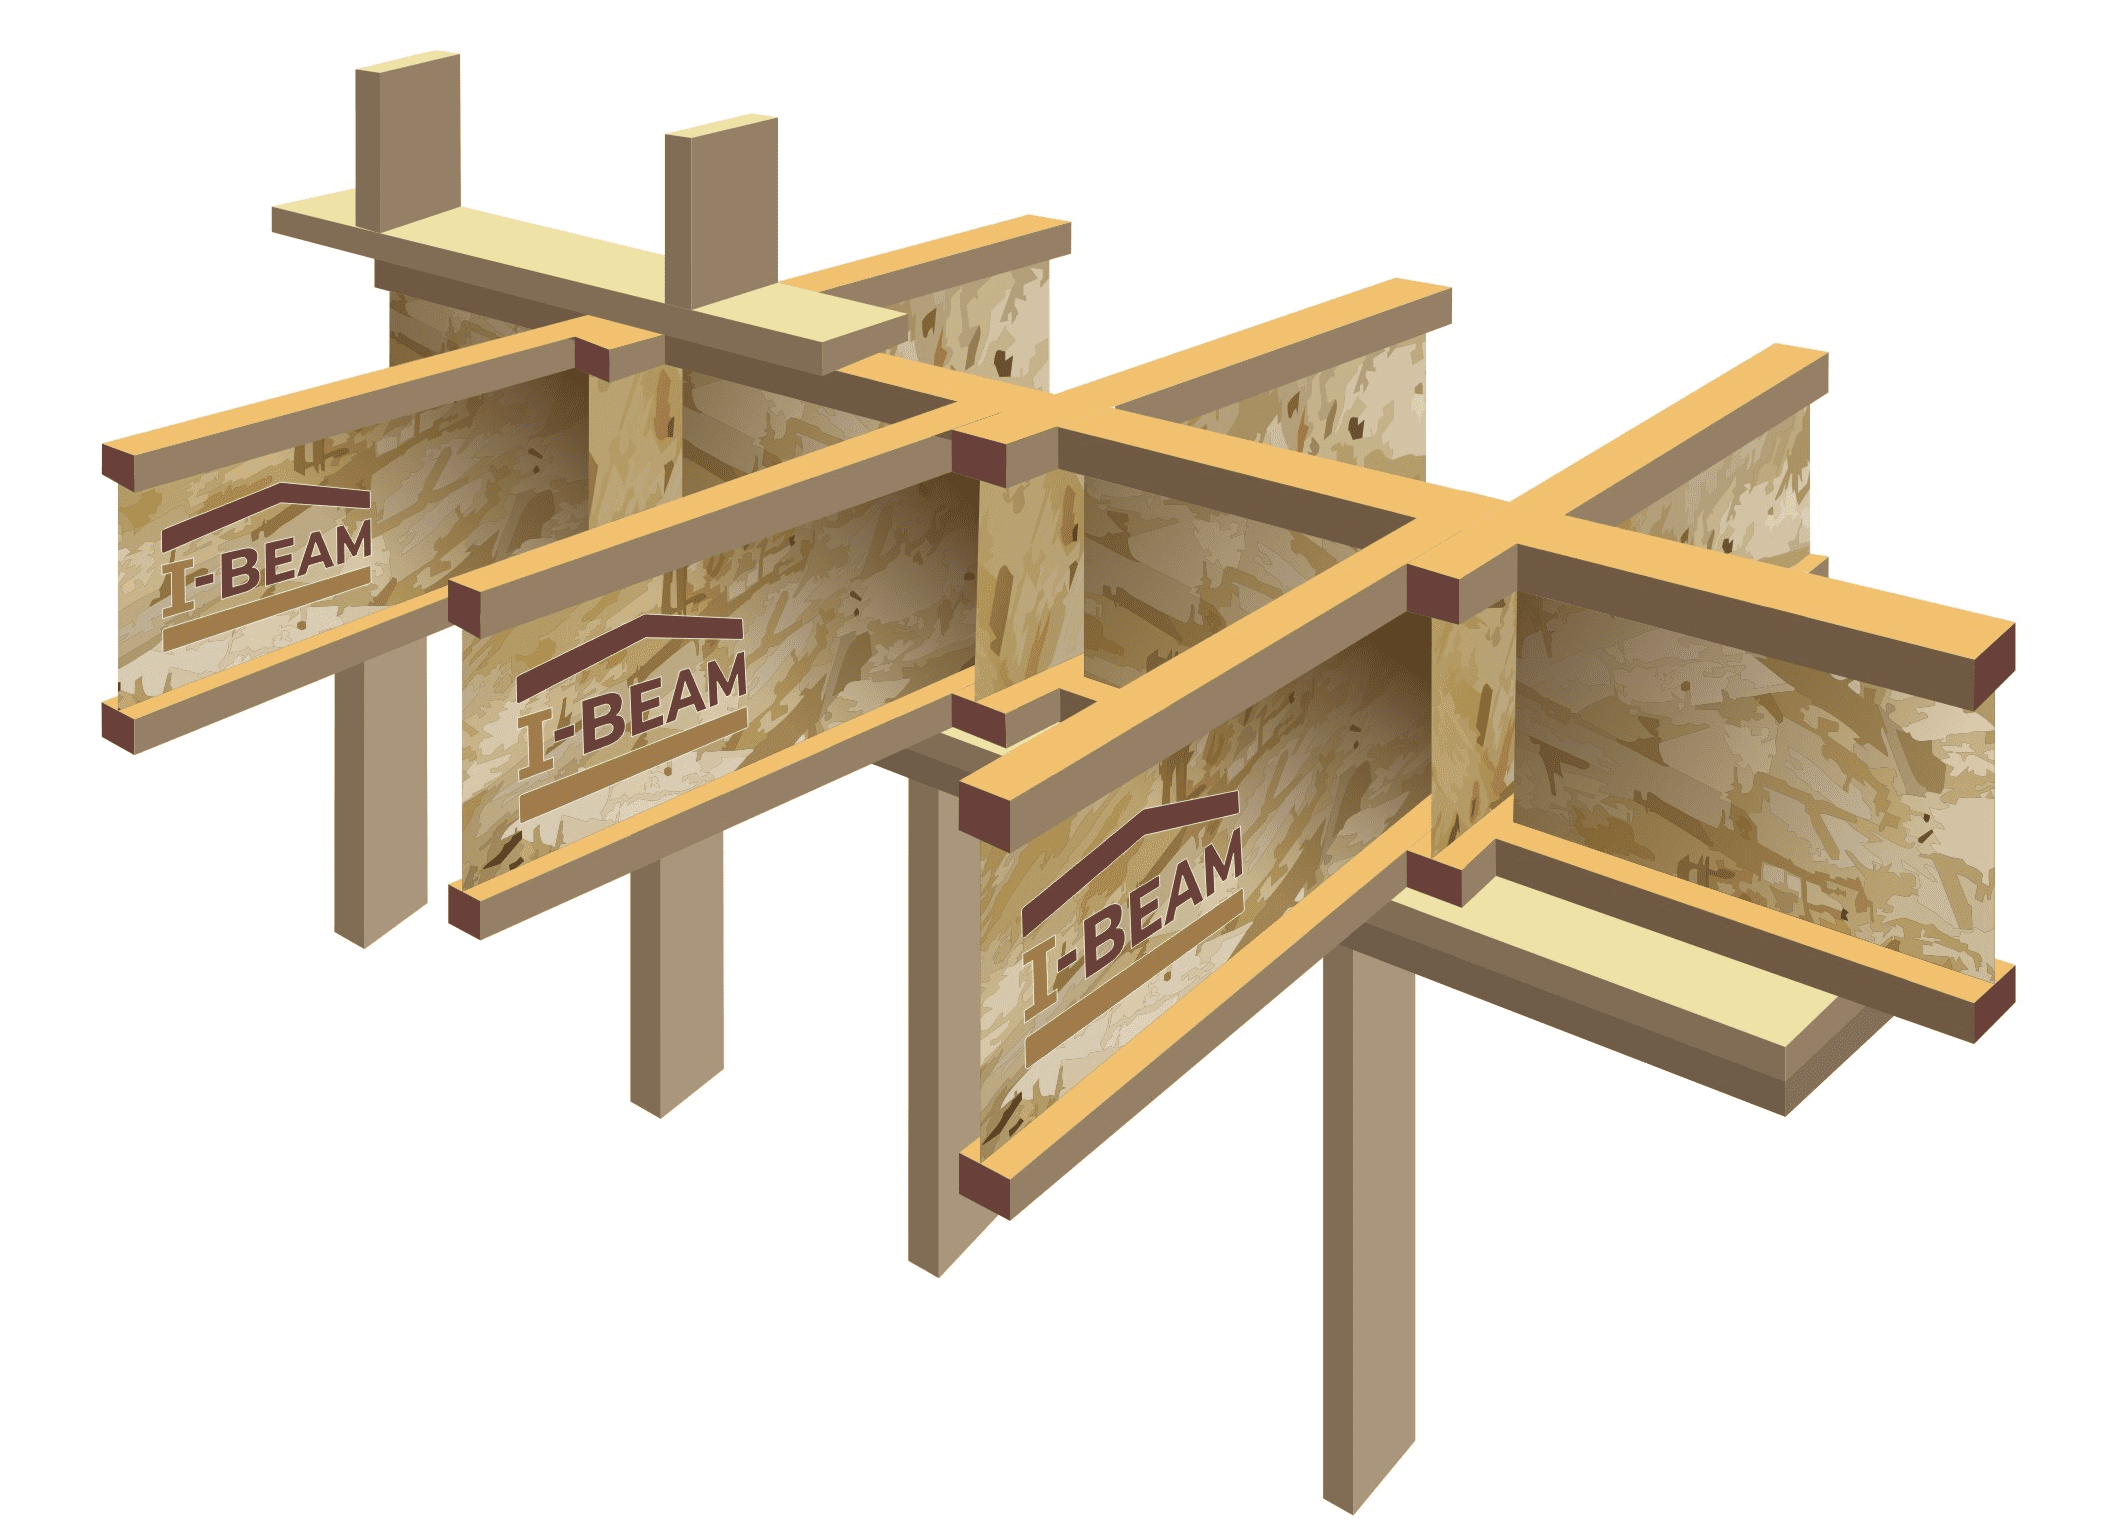 |
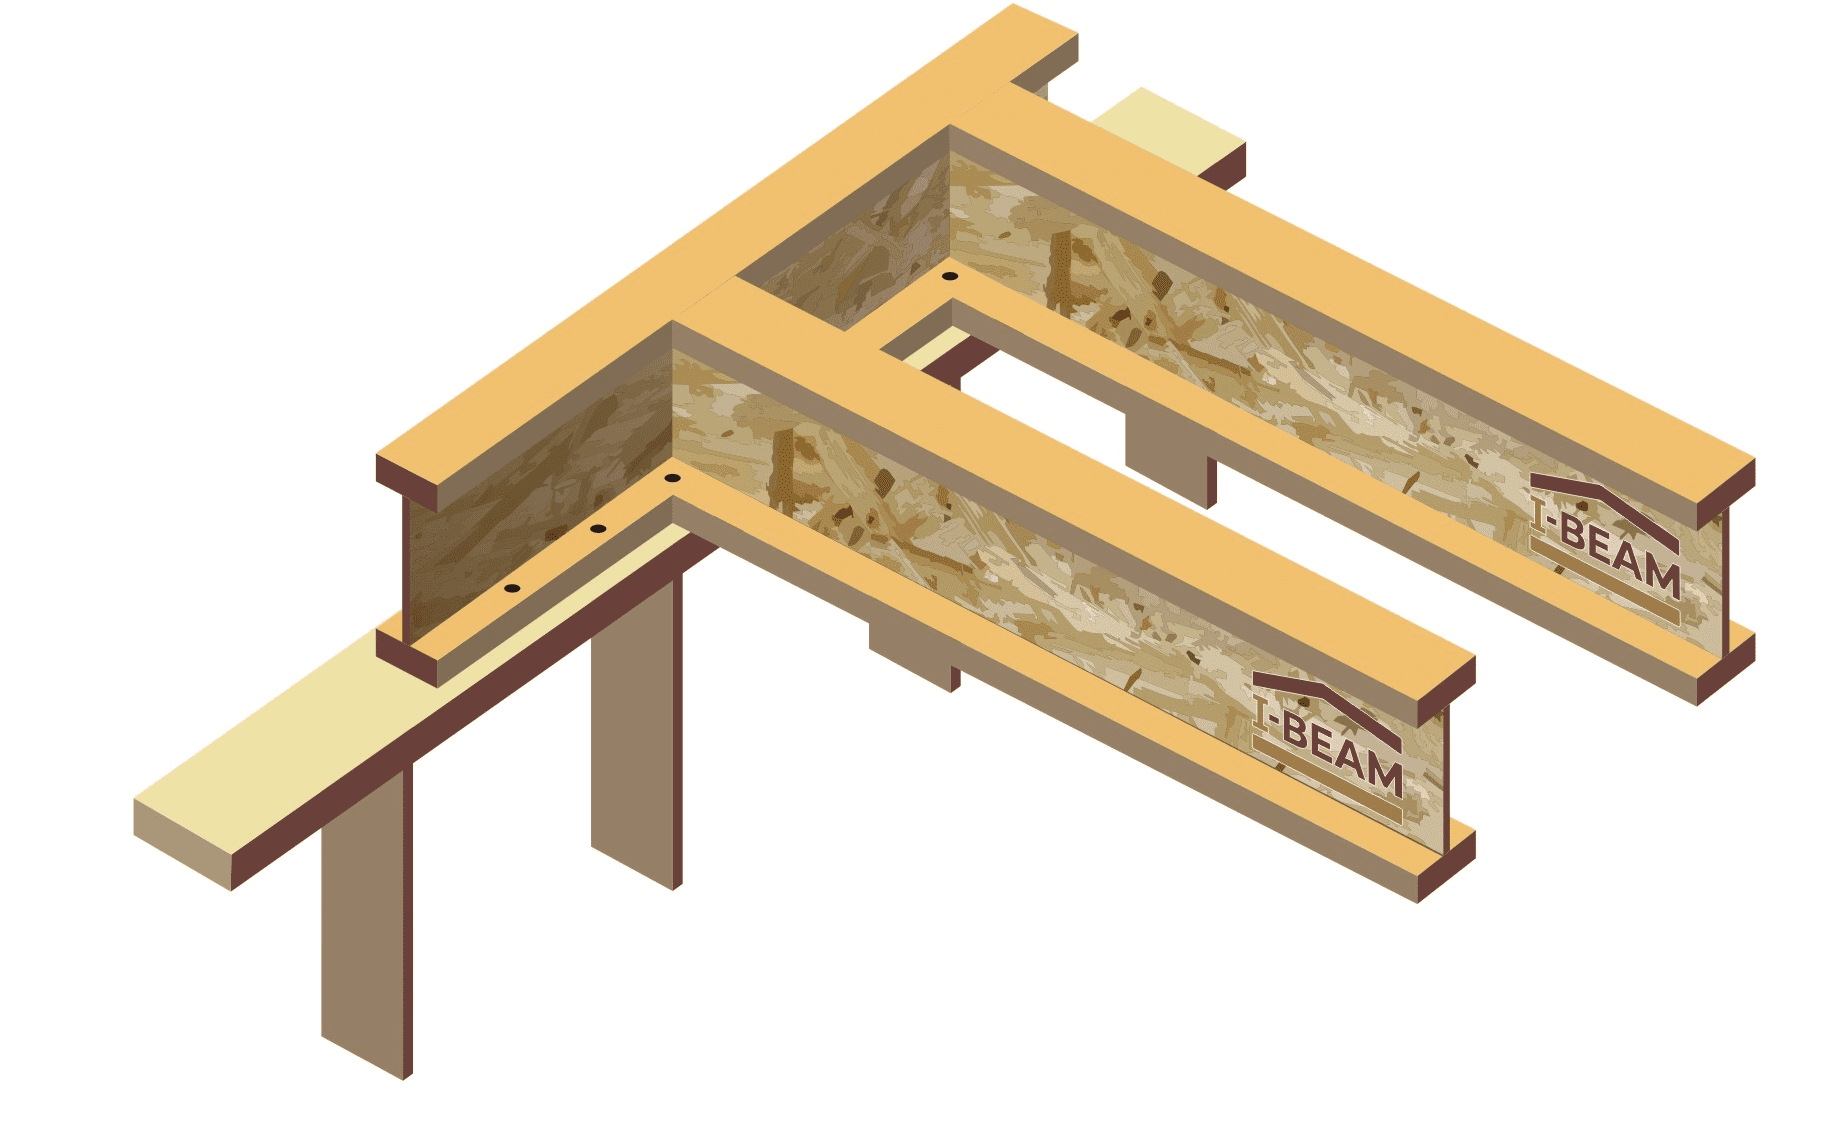
When building the second floor of the house, the support of the i-joist ends on the inner wall, as shown in the diagram. In this case, the i-joists are overlapping each other. For greater strength and even load distribution, connections are established between the i-joists. |
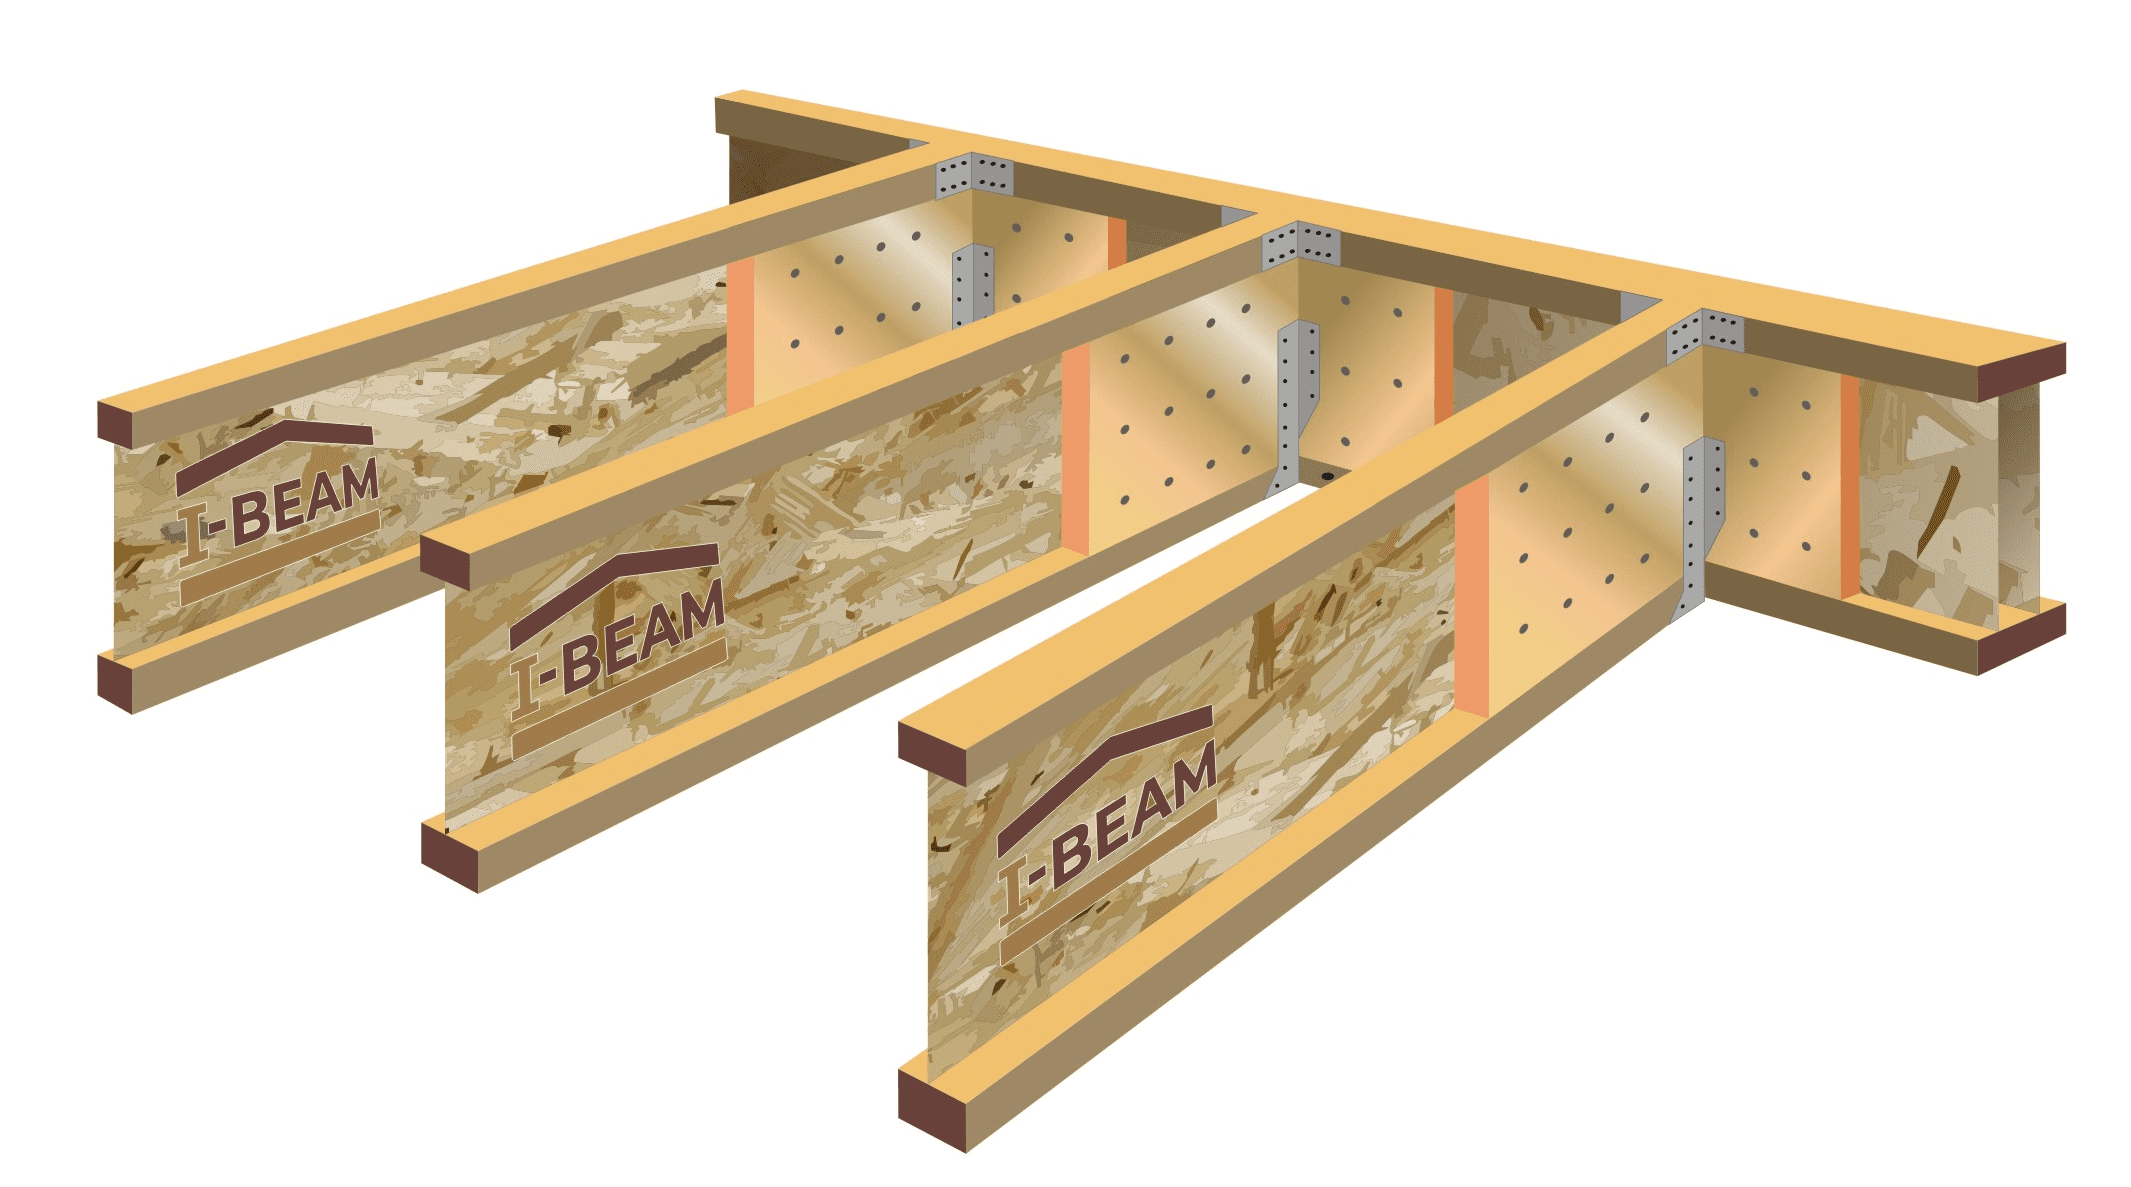 |
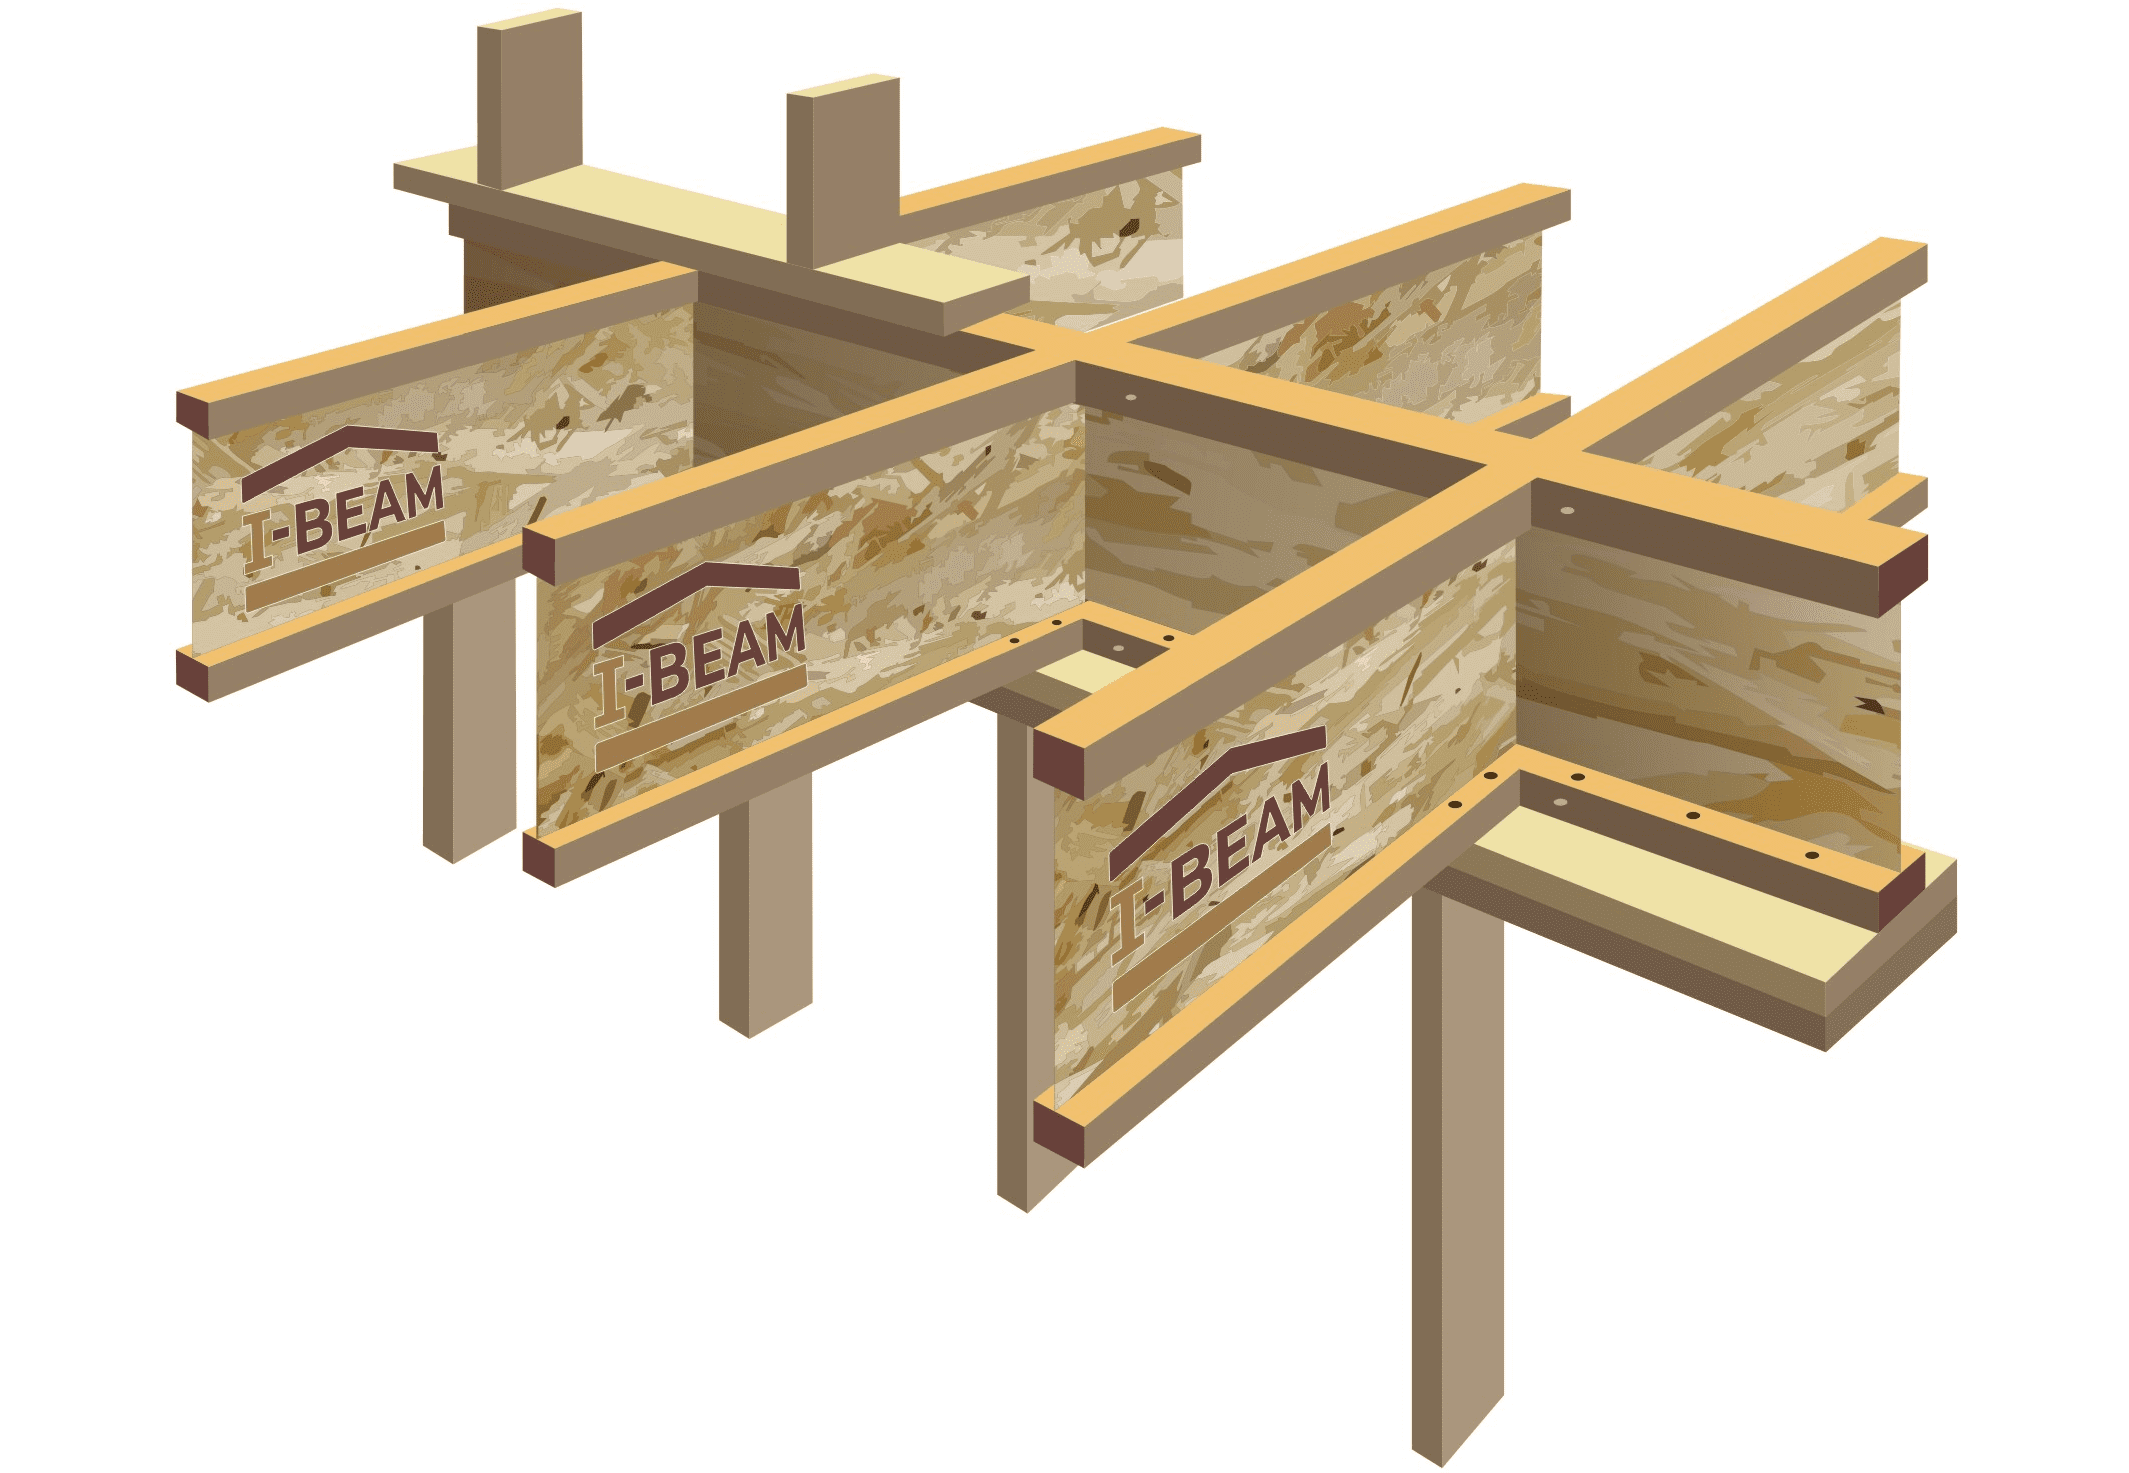
End fastening to double i-joists is mainly used in stairs. In this case, the main i-joists are attached to the double i-joist using metal i-joist supports. When doubling beams and installing supports, it is mandatory to use a mortgage board to avoid deflection of the beam walls. |

|


 WhatsApp
 Call me